
You want to escape from the monotonous work and bustle of the city, relax, clear your head of many thoughts, and think quietly about what is important to you. For example, how many times have you wanted to see the process of working on a project as a whole in the form of a Mind map?
A large number of people whose activities are in some way or another related to projects encounter such thoughts. So the need arose to create a graphical tool to monitor the progress of the work. Such a tool should answer several questions:
- What stage are we at right now?
- If there are a number of tasks, which one is relevant right now?
- What will be in the next stage?
- What is needed to complete the task(s)?
- What is stopping the tasks (and) from being accomplished?
All of these answers to questions are necessary to work on the final product. It happens that it is necessary to launch a new project, in which case you should pay attention to the following points:
- Determine the intermediate micro-objectives that need to be accomplished;
- All of these tasks should work together as a package;
- Some of these tasks may have to be divided into smaller tasks.
In this regard, there is a need to systematize tasks from different projects. And this causes difficulties – there is no control over the tasks, it is not clear at what stages the work is, and so on.
And what to do if identical tasks are used in different contexts and for different purposes? The situation becomes several times more complicated.
WORKING WITH THE Planfix mind map
Thinking about this, the Planfix team came up with the creation of a new kind of planner, the Mind map.
Adding a Mind map to the planner is done very easily:

Add the Mind map to the scheduler.

Mind map of connections without tasks.
THE BEGINNING OF WORK
Mind map are now available in several packages: business and corporate.
When planning, you can start from scratch, create theoretical blocks and establish links between them, and then create tasks from a set of blocks as needed and distribute them to employees.
To add a block you need to click on the plus sign. This is how new blocks are added.

Or directly add existing tasks to the board by dragging them from the adjacent Scheduler list or by selecting them from the general list of tasks.
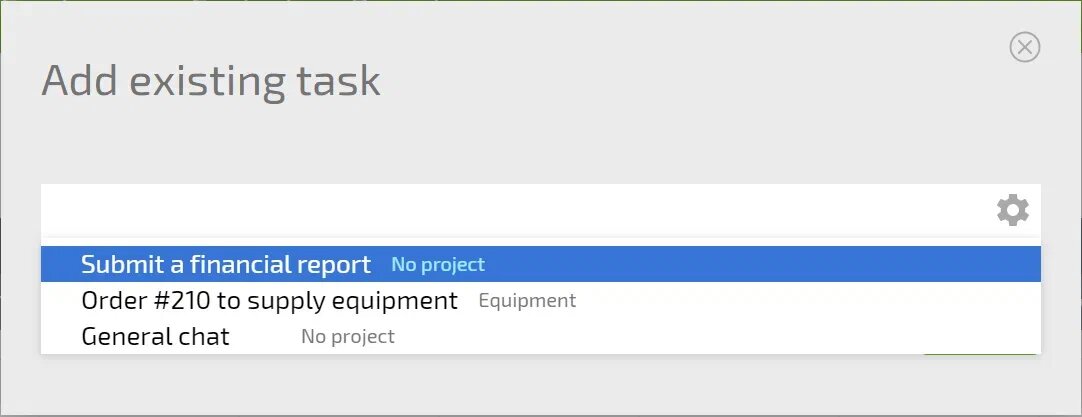
To select a task, simply click the “Add existing task” button:

Next, select the task to add to the Mind map:
And if you click on the expanded list icon on the right, the task list will open. The list of tasks will be saved there, and if there are no tasks, there will be an empty field.

And if you click on the icon with the expanded list on the right, a list of tasks will open. A list of tasks will be saved there, and if there are none, there will be an empty field.

After clicking on the block in the Mind map, additional options will be activated:
- Give task status
- Set or change color
- Delete
- Make a link to other blocks or tasks

NAVIGATION
We try to make our service easy to use, so we strive for intuitive operation.
Mouse wheel up and down = zoom the board. Down – zoom out, up – zoom in.
- Hold PCM (right mouse button) on an empty space or hold spacebar + LKM (left mouse button) = move board to any side.
- Clicked LKM on a block = highlighting the card and displaying additional options.
- Pressed CTRL:
- Click LKM on blocks in turn = highlight multiple cards at once.
- Click on the highlighted block again = deselect.
- Press and hold LMB to draw a rectangle around the blocks = select multiple cards at once. You can move the selected cards by holding down any of them with the left mouse button.
- Click on the arrow connecting the blocks = selection of a link. Press the “Delete” button to delete the link.
- A combination of “CTRL” + “Z” will undo the last change in the Mind map.
WORKING WITH TASK CARDS
Blocks in a Mind map can easily be turned into a task. Select the block and click to select the desired command.

The window with the creation of a new command will appear. The default task template from the settings of the user who created the Mind map will be automatically added to the Template field, and the name of the block will be substituted in the Name field.
The rest of the settings do not differ from the process of creating a new task. After saving the settings, the block on the Mind map of the links will turn into a task.
To quickly go to the task, click on the “Go to task” button, after which the task panel will open on the right, as it usually does in Planfix:
Attention! The color of the task is kept the same as its status.
ACCESSES
Do not forget that there are 2 levels of access for employees:
1. Scheduler level.
All employees who have access to this level will see the Mind map. Only the author can change it.
2. The task level.
A user who is viewing the tasks in the Mind map and does not have access to these tasks, at an attempt to go to them he will see a standard Planfix window with an access request.
EXAMPLE OF MIND MAP

The important thing is that the links established between tasks live only in one Mind map! This means that you can drag and drop the same tasks from the Planner to different Mind maps and link them together in different ways.
Don’t confuse, links in the chart with links between tasks in the Dependencies panel, which affect the scheduled start or finish dates of tasks.
CONCLUSION
With the Mind map in Planfix, you can go all the way through a task: from its conception to its realization, assign performers and control their work.
*You can also use a task in Planfix as a project (by making it a main parent task), and its subtasks will be project tasks.